Glittered
die cuts
Stick
the acetate to the back of the die cut shape, ensure you have covered
the area to be glittered. On the back of die cut, fill the area to be
glittered with glitter glue (or cosmic shimmer glue) on the back on
top of acetate.. Sprinkle glitter over the glue, using forceps tip
off excess glitter and leave to dry. When dry the glitter will be
visible from the front.

Blue
flower
Glitter
corners as above with blue glitter. Flower is 7170 or china blue
pen. Chalk to edges.
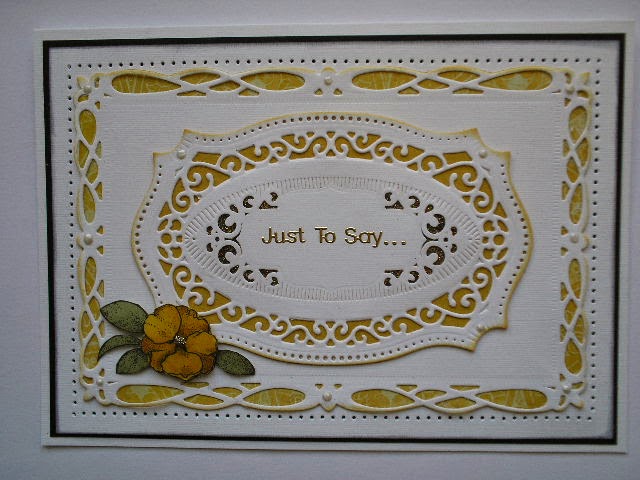
Mustard
flower
Glitter
the areas adjacent to the sentiment as above with dark green glitter.
Flower sunflower or cadmium yellow and 544 or raw sienna promarker.
Leaves marsh green. Pearl cosmic shimmer dots to decorate. 3d foam
pads under flower and platinum stickles to centre. Black soot ink to
edges of largest layer. Scattered straw ink or chalk to other edges.
Stick backing paper to largest die then trim to fit. Prick holes
around edge of largest layer with 'holey' ruler and poky tool.

Pink
flowers
Apply
acetate and pink glitter to second layer. Stick the lattice frame
under largest die trim to fit then put lilac paper under lattice and
trim to fit. Pink flowers need to be creased along the embossed
lines. Leaves cut out and coloured with marsh green then glued under
the pink flowers add pearl gem to centres. Other gems to top 2
layers.

Orange
flower
Put
the die cut shape with the 4 corners on
inside the next size frame. Apply acetate and glitter as above with
orange glitter. Flower amber and honeycomb, leaves marsh green. 3D
foam pads under flower. Stick the backing paper to die then trim to
fit.

Bird
Leaves
marsh green, caterpillar pastel beige, branch umber, hat and bow tie
berry red, bird legs and hat band henna. Breast ice grey 3, collar
spice or sepia, wings and head walnut or burnt sienna. Chalk sky,
edges frayed burlap ink or chalk.
No comments:
Post a Comment